Post by Candyman on Mar 15, 2008 0:41:05 GMT -8
For this demonstration, A TView 6.5" TFT Headrest Monitors were used
.
Here is the process to give you a good general idea of how it is done:
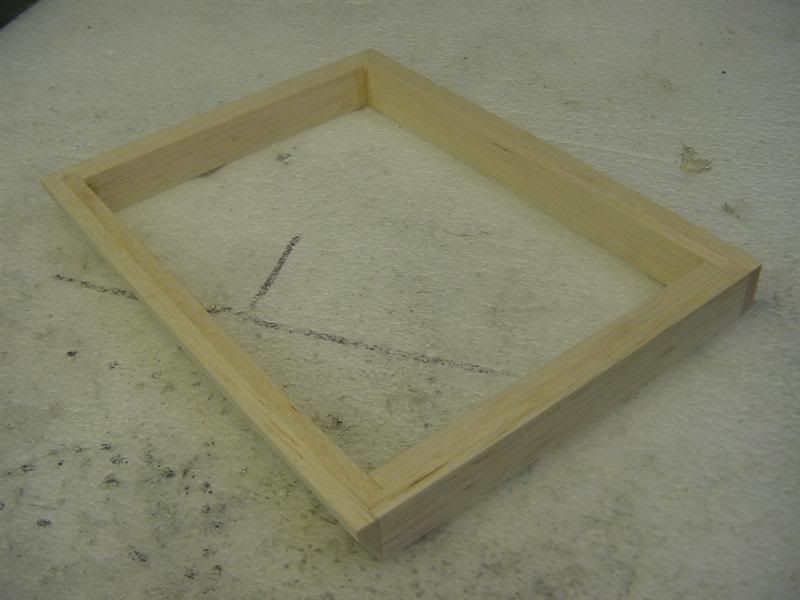
Remove your headrests and the covers. Construct a balsa wood frame for your headrest shrouds. We used 1/4" x 3/4" strips of balsa cut and glued 2 layers thick to allow for a radius beyond the edges of the shroud. Use medium CA, and stagger the corners for strength. I angled the bottom edge to make space for the seam in the upholstery and to better align with the bottom of the headrest:
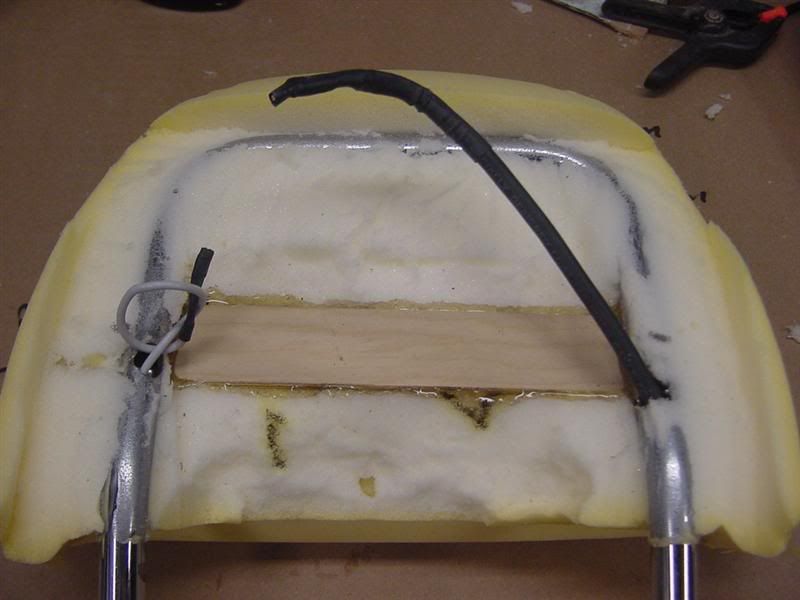
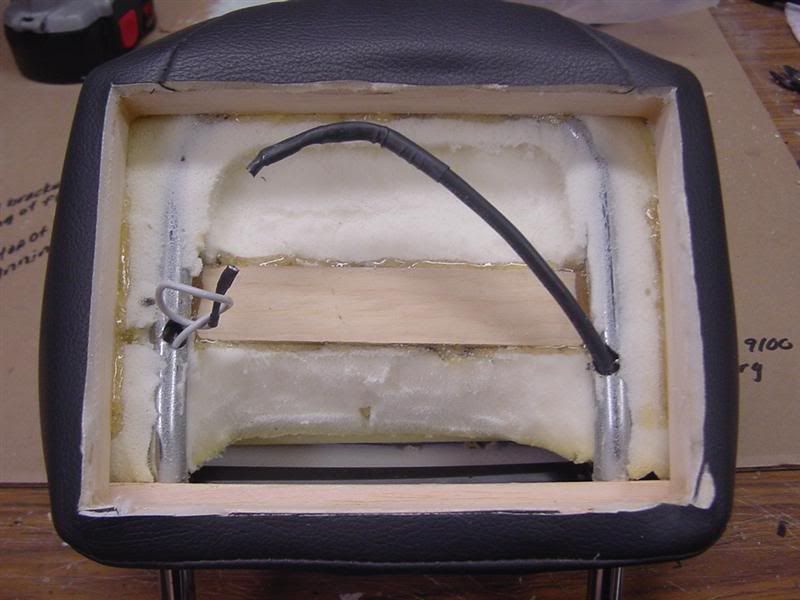
Trace your frame on the back of the headrest, and cut away foam down to the tubing, and until the headrest fits just even at the bottom. Remove some additional foam in the center for airspace and wire space. Add a piece of 3/16" hobby plywood just wider than the tubes wedged and glued underneath to later screw your shroud into. Drill a hole into each tube to fish your wires through:
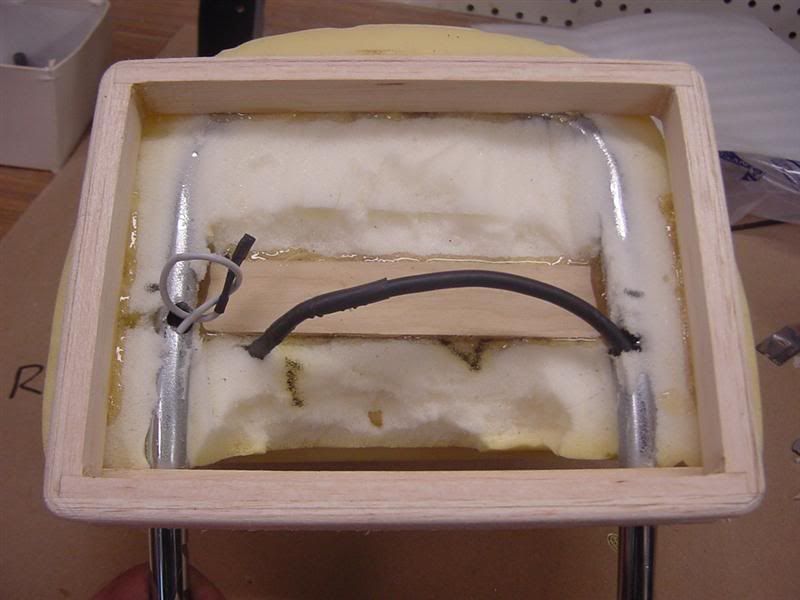
Sand some nice radius's on your frame, and glue it in square. I used hot melt to glue everything in the headrest:
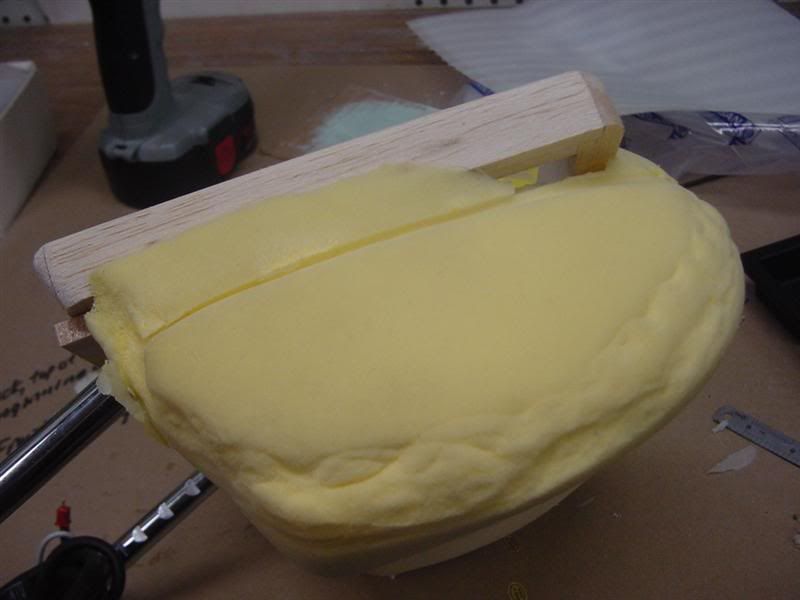
Align the bottom of your frame with the bottom of the headrest. Note the amount of foam that needs to be added in the top corners. These were later stuffed in after upholstering. We also added a shim of balsa to the bottom of each frame between the frame and the tubes for added stiffness:
The next step is tough. Pull the upholstery back over your headrest. This will take patience and time, but once you get it started it goes fairly quickly the rest of the way. I recommend another set of hands. Make sure that your frame is well constructed and securely glued to the headrest so you don't break a corner joint like I did the first time. Then cut out the hole undersize, glue down the edges, then final trim the upholstery flush. Stuff the open areas in the top corners with ripped up little pieces of foam pushed in on the end of a small phillips.
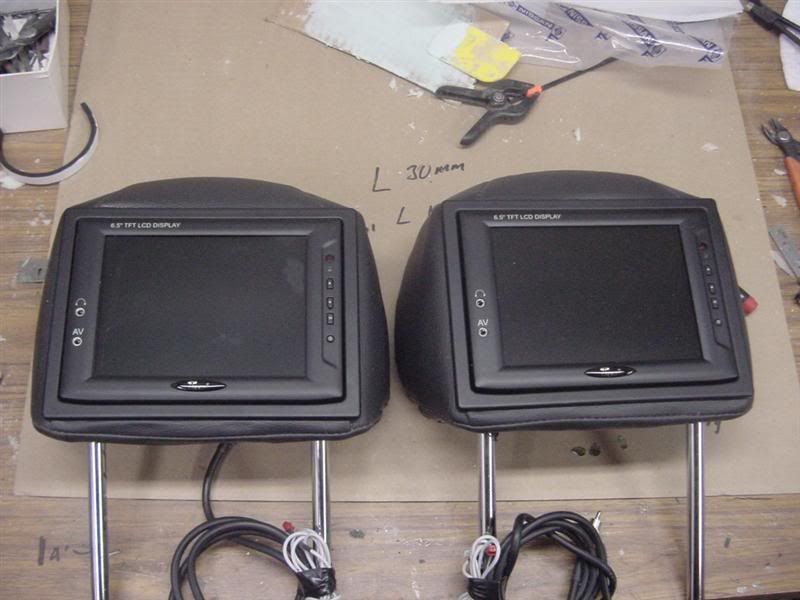
Now reinstall your shroud, cut, fish, and splice your wires, drill your mounting pilot holes, and install it with the two center screwholes and some panhead wood screws. Plug in the screens, and they snap in place.
Take it easy,
Candyman
.
Here is the process to give you a good general idea of how it is done:
Remove your headrests and the covers. Construct a balsa wood frame for your headrest shrouds. We used 1/4" x 3/4" strips of balsa cut and glued 2 layers thick to allow for a radius beyond the edges of the shroud. Use medium CA, and stagger the corners for strength. I angled the bottom edge to make space for the seam in the upholstery and to better align with the bottom of the headrest:

Trace your frame on the back of the headrest, and cut away foam down to the tubing, and until the headrest fits just even at the bottom. Remove some additional foam in the center for airspace and wire space. Add a piece of 3/16" hobby plywood just wider than the tubes wedged and glued underneath to later screw your shroud into. Drill a hole into each tube to fish your wires through:

Sand some nice radius's on your frame, and glue it in square. I used hot melt to glue everything in the headrest:

Align the bottom of your frame with the bottom of the headrest. Note the amount of foam that needs to be added in the top corners. These were later stuffed in after upholstering. We also added a shim of balsa to the bottom of each frame between the frame and the tubes for added stiffness:

The next step is tough. Pull the upholstery back over your headrest. This will take patience and time, but once you get it started it goes fairly quickly the rest of the way. I recommend another set of hands. Make sure that your frame is well constructed and securely glued to the headrest so you don't break a corner joint like I did the first time. Then cut out the hole undersize, glue down the edges, then final trim the upholstery flush. Stuff the open areas in the top corners with ripped up little pieces of foam pushed in on the end of a small phillips.

Now reinstall your shroud, cut, fish, and splice your wires, drill your mounting pilot holes, and install it with the two center screwholes and some panhead wood screws. Plug in the screens, and they snap in place.

Take it easy,
Candyman

