Post by Candyman on Mar 24, 2009 21:37:30 GMT -8
Hey Everyone,
Every once in a while I run across someone who is thinking about doing flames on their PT. While Custom Paint is always cool, I wanted to give you a run down on what all it takes to do a Custom Flame Job.
Before we begin, the only advice I might offer, and keep in mind this is just my thoughts when I used to play with custom paint work, and design back in the day. Most of the guys that I hung out with messed around with an air brush, did custom graphics , and were usually pretty artistic!
With this said, their are two kinds of customers when it comes to custom paint.
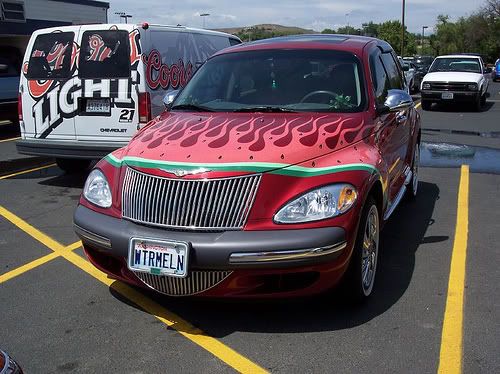
1. The first is the customer that is very set on one design, at which point the Body Shop will do it exactly the way the customer wants no matter if you might want Watermelon style flames, to you name it, which is fine, as ultimately its up to the customer!
2. On the other side of the spectrum, you have a customer that has a basic idea of a layout, but asks the painter, and air brush artist for their input, and see where that leads to! Kind of give them a little freedom to express their style, and creativity in your idea to create a piece of rolling art!
After all, Seasoned Automotive Graphic Artists have picked many colors, and done many different designs over their career! They have a pretty good knowledge of what works, and looks good, and would love nothing more than to become inspired by your design, and help transfer your concept into something really great! Then you will most likely find the air brusher to become a lot more into your project, and excited about making your custom paint into something really special, and eye catching! That is exactly how I handled my flames! I helped design the basic layout freehand in the booth, and allowed my friend to come in, and have some freedom over whatever he wanted as far as making it look cool, which made plain black flames, to "Wow, look at that"! So do not be afraid to ask questions, get other feedback! Ask about adding drop shadows for definition, or maybe some smoke peaking out from behind a flame lick, or hand pin striping to accentuate the lines, and so on!
Great Paint doesn't need to be over the top, cost a fortune, and be blindingly bright! More often than not, what catches ones eye is in the smaller details. The simple small details that make your paint more interesting, and totally unique to you!
So, what inspires you???
Here are a couple of color ideas for you!
Here is a PT with traditional Flame Color.
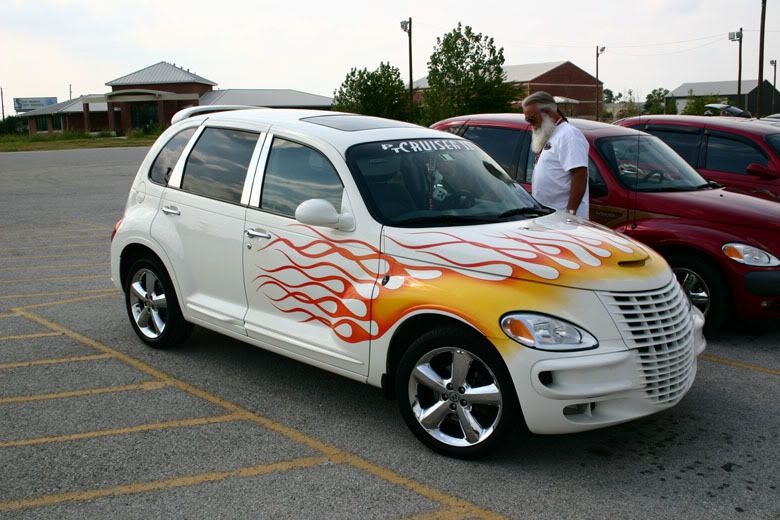
Here is a PT with a clean layout, and just a hint of color.
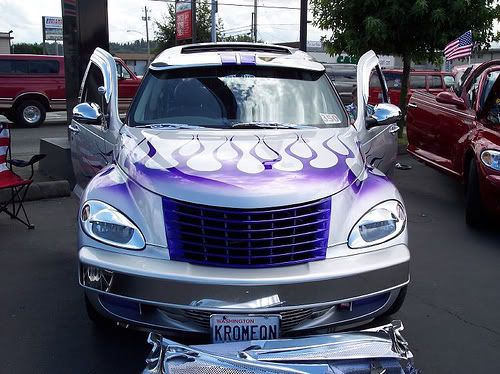
And finally, something subtle, but clean with a very neutral color that is not overstated, but just enough to give it that really cool look!l.
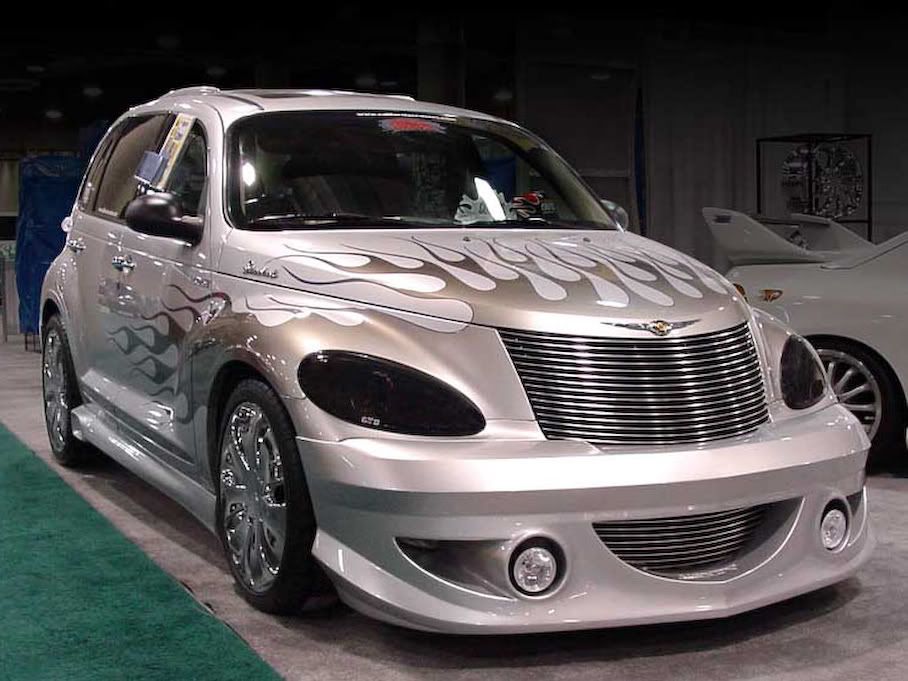
Here is a Link below to give you several choices on different colors and layouts to give you some idea's on things you can do.
s458.photobucket.com/albums/qq308/WestValleyCruisersPTCruiserArchives/CUSTOM%20FLAME%20JOBS/
Once you have decided on how you want for your color scheme, and layout, then here is a basic walk through on the work involved for a typical Flame Job. This was my Flame Job I did on my PT back in March of 07.
We started by disassembling most bolt on items like mirrors, door handles, emblems, from the car. In my case, I had a couple of defects in the paint, and chose to re-shoot the front bumper, and grille separately, so they were removed, and we also smoothed out a couple of spots on the body as well. Once the car was stripped, the paint was color sanded to the rear quarter panel.
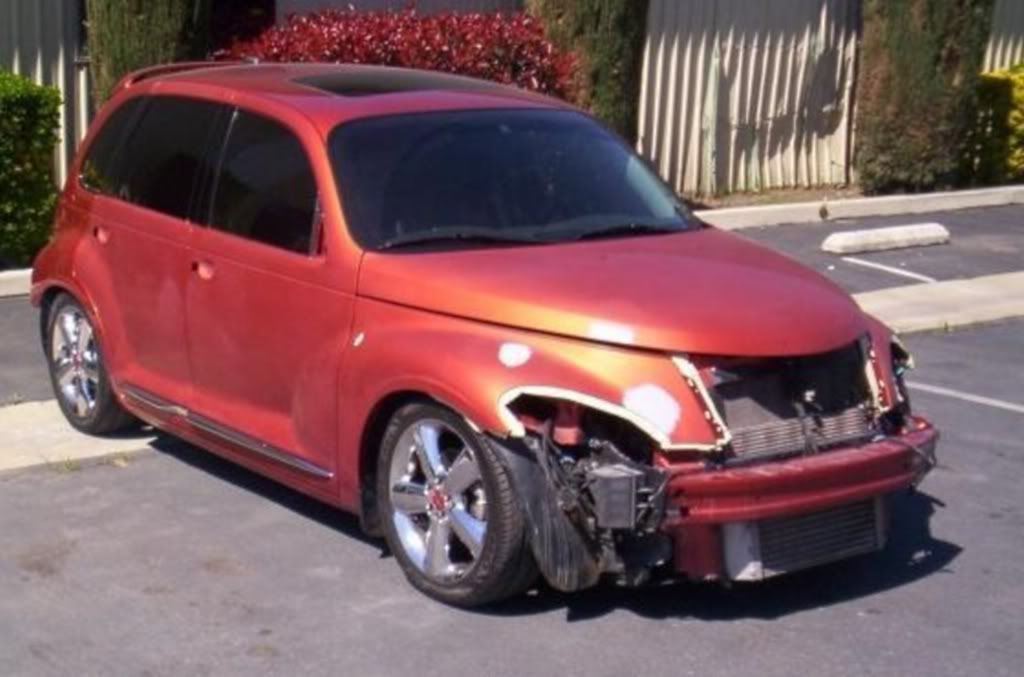
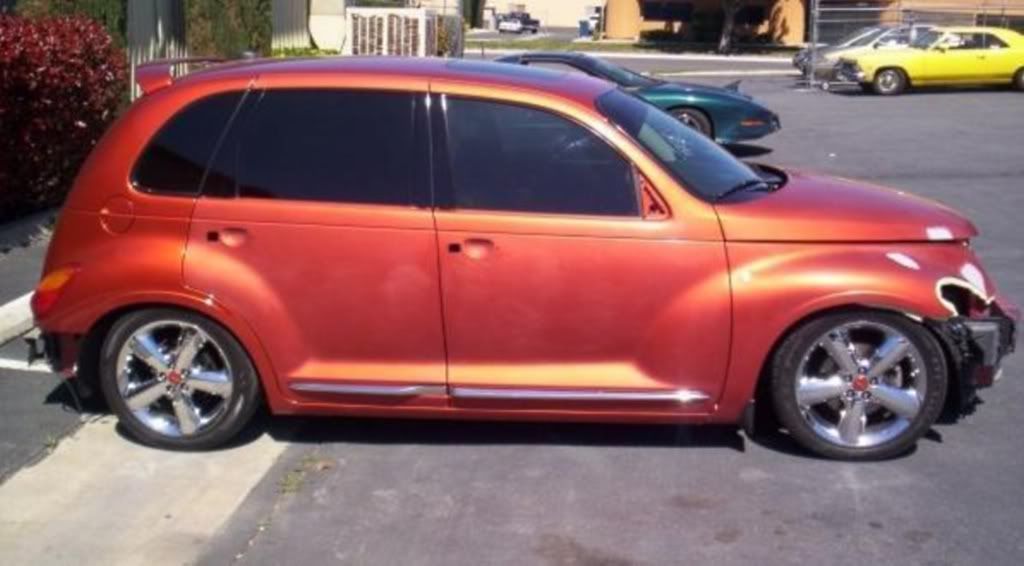
Next we prepped, and masked the car, rolled it into the paint booth, and started laying out the flame design with thin tape. Their are a couple of methods for laying the design out. The newer ways utilize the computer stencil to get everything measured, and exact. We instead did mine the old school traditional method by laying out the flames by hand, and using sight for measure, which requires a more skilled painter, with a good eye to pull off.
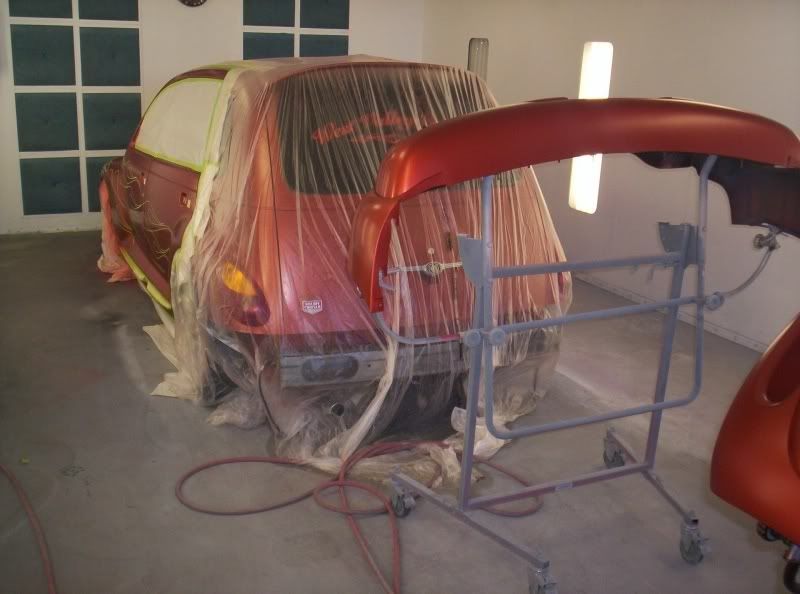
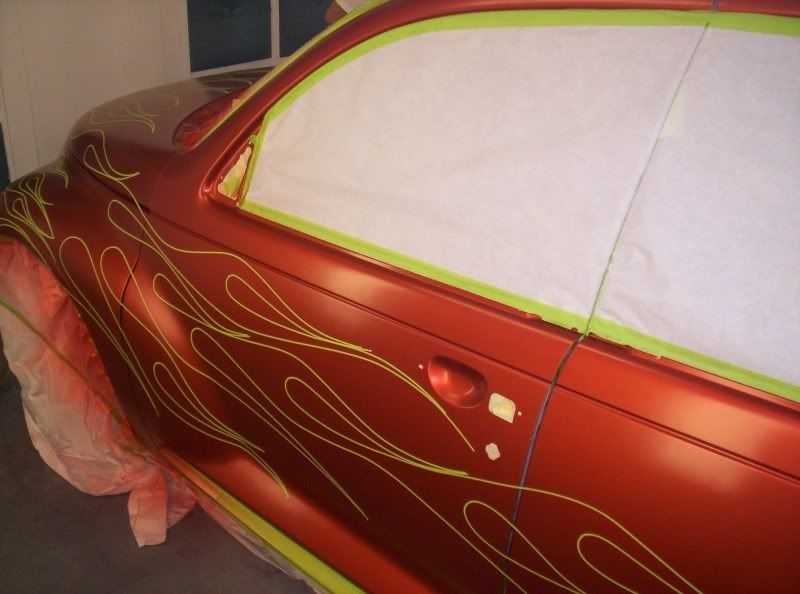
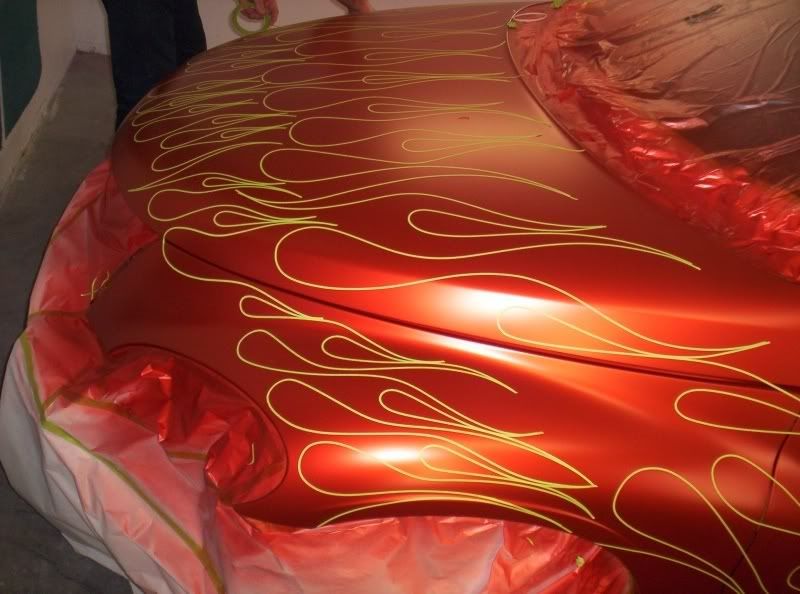
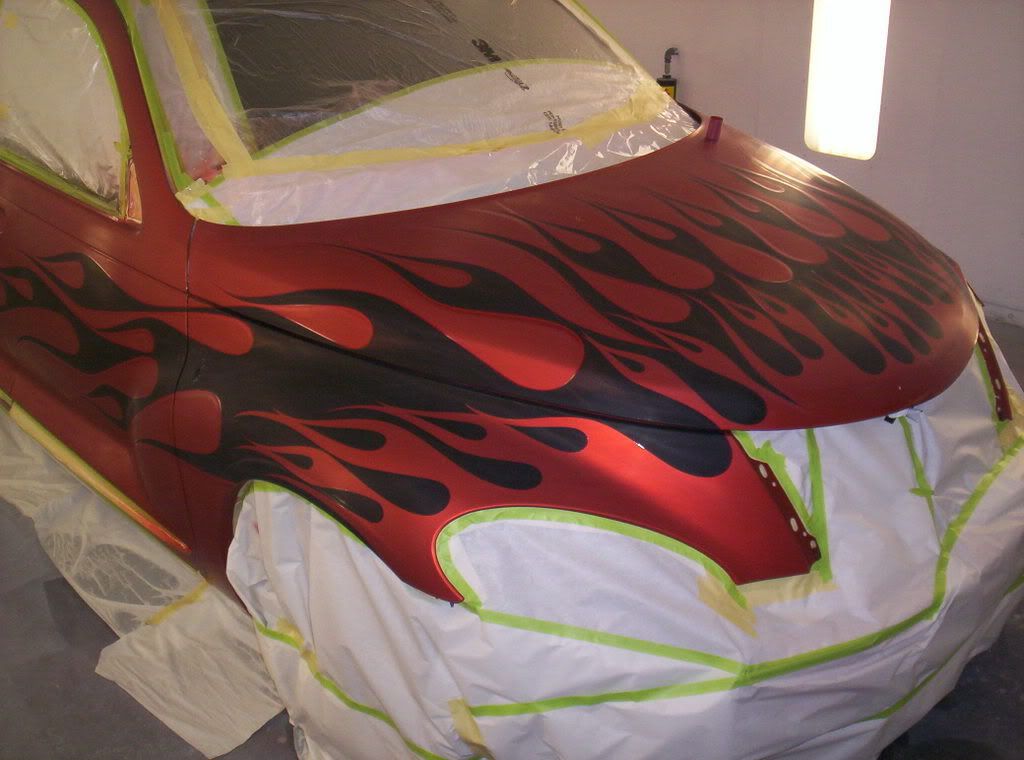
After doing the layout, we then back masked the rest of the car that was not to be painted, and then proceeded to prep, and shoot the black flames. After letting the paint cure while we took a break, we went back in, and used an air brush to shoot copper Ice Pearl with Microflake at the tip of each flame, and then alternated streaks of gold, silver, and gunmetal gray Ice pearl with Microflake into the entire flame design to give it more depth, and the illusion of changing multiple colors as the sun hits it which gives it a little pop.
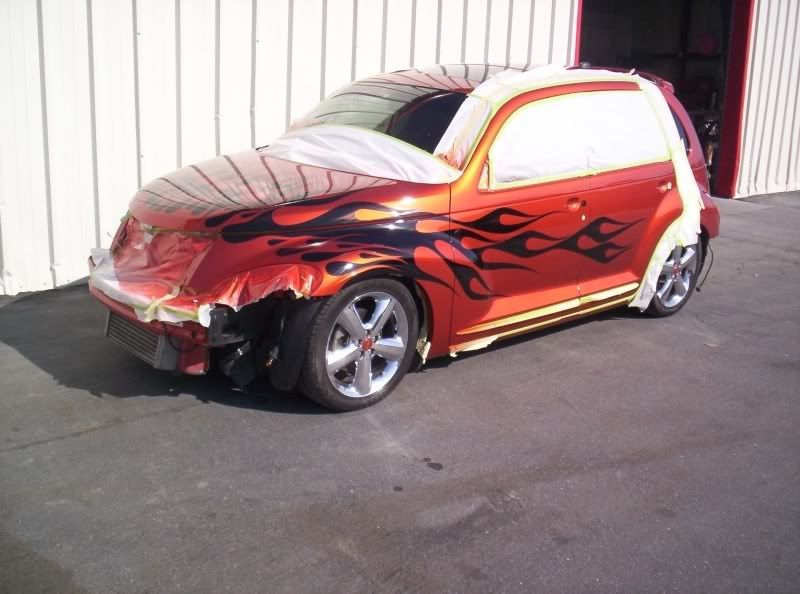
After letting the paint bake, and cure, we color sanded the paint back down to a dull flat surface, and moved on to our finishing touches. My friend Roger took over the air brush back, and did a maroon drop shadow to give the flames a 3D effect, and then finished off with a hand pin stripe that transitions from orange up front, to red as it progresses from front to back.
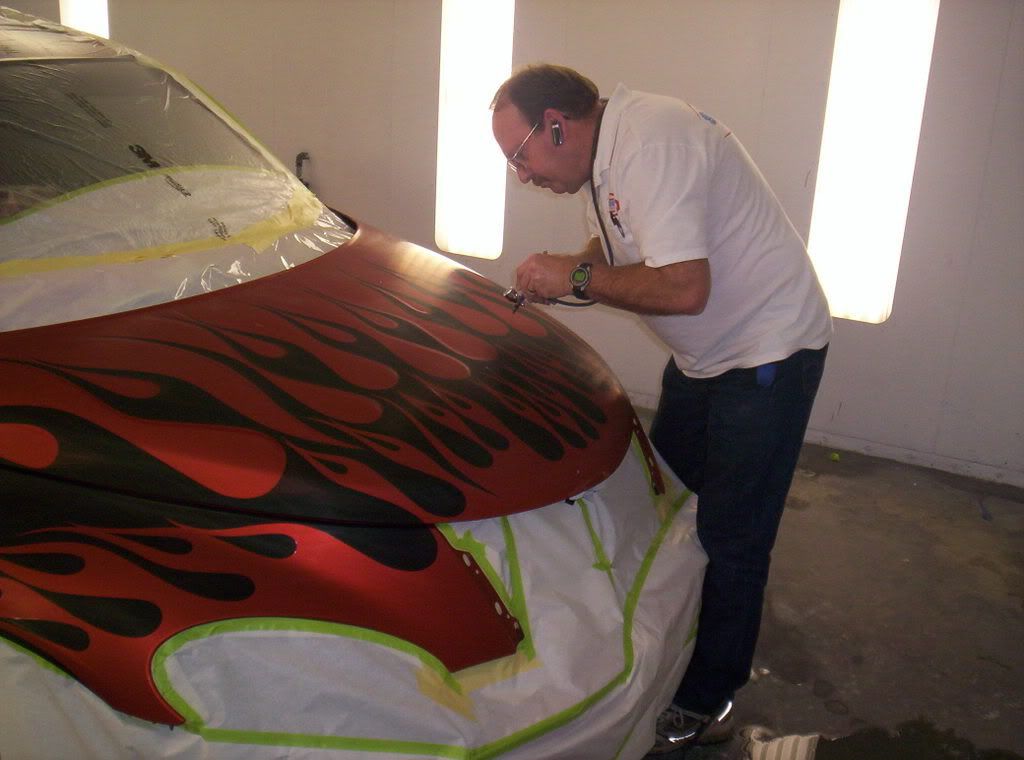
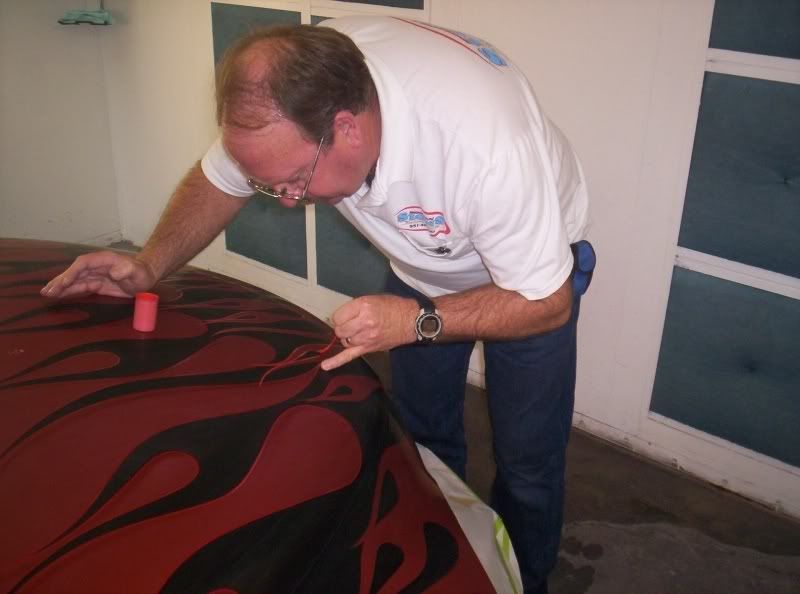
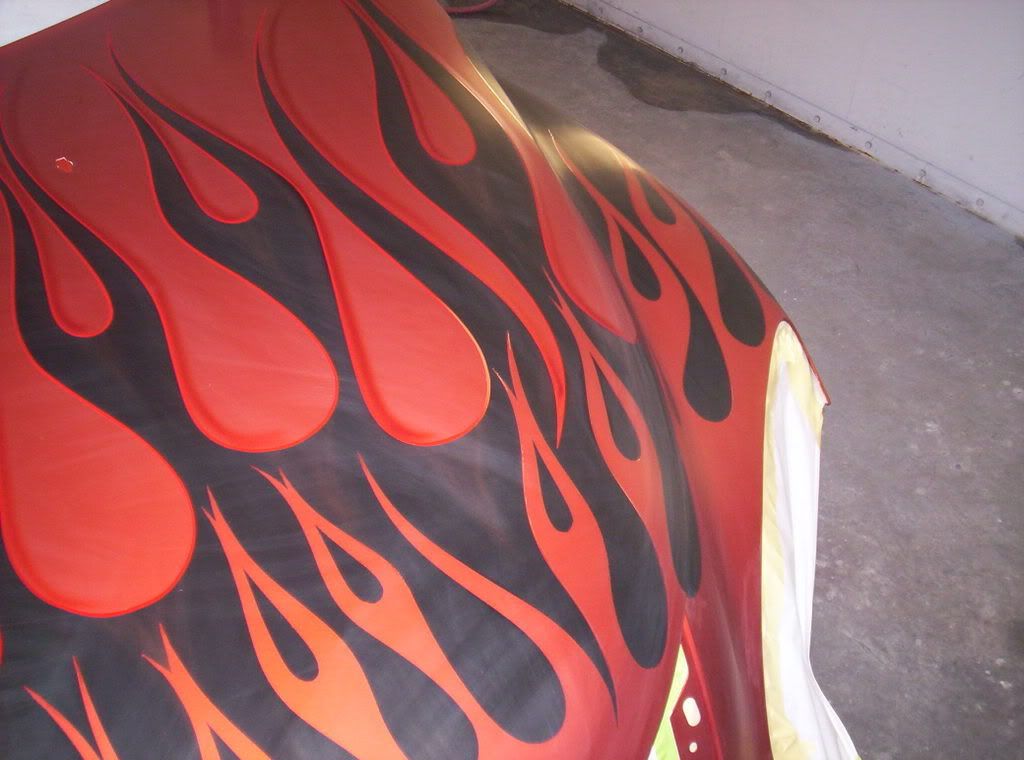
And finally, we shot 14 coats of clear, and here is the final look. The reason we used so much clear was to give it a deep rich color, and protect the flames from damage.
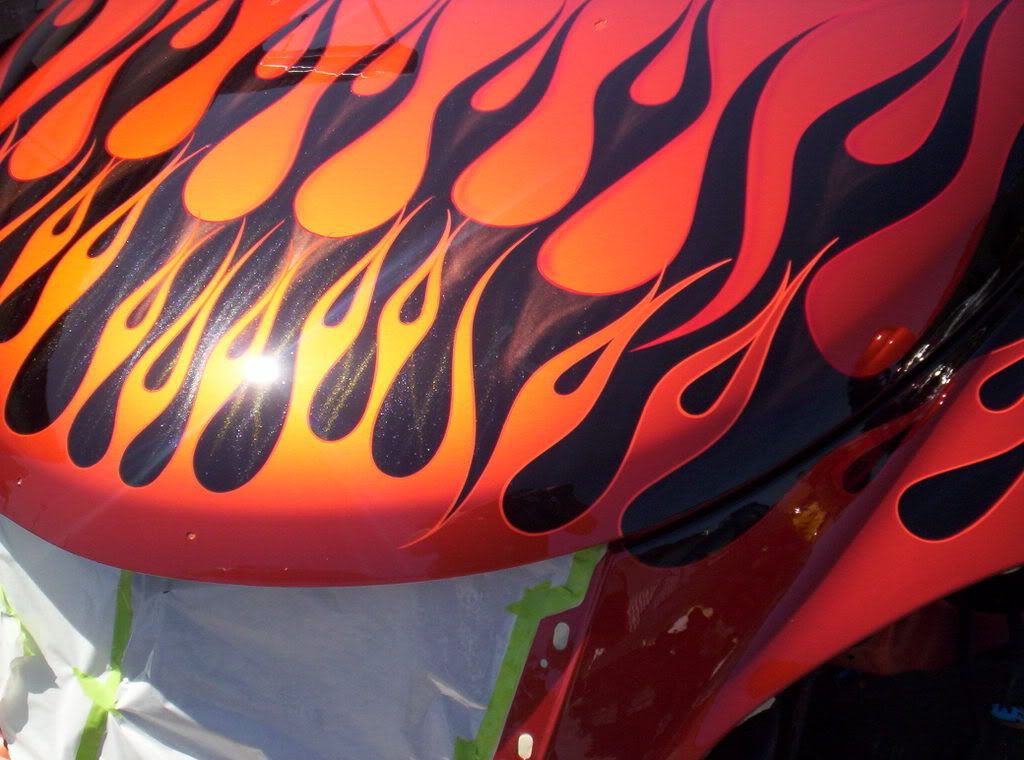
After the paint was baked, and cured, it was all color sanded down again, and buffed back out to a high gloss finish, and then final assembly.
We purposely designed the flame layout with future plans in mind, as I want to shave my door handles, and redo my front end later on, and can now do both without having to go near the flames in the process. And here is the car today.
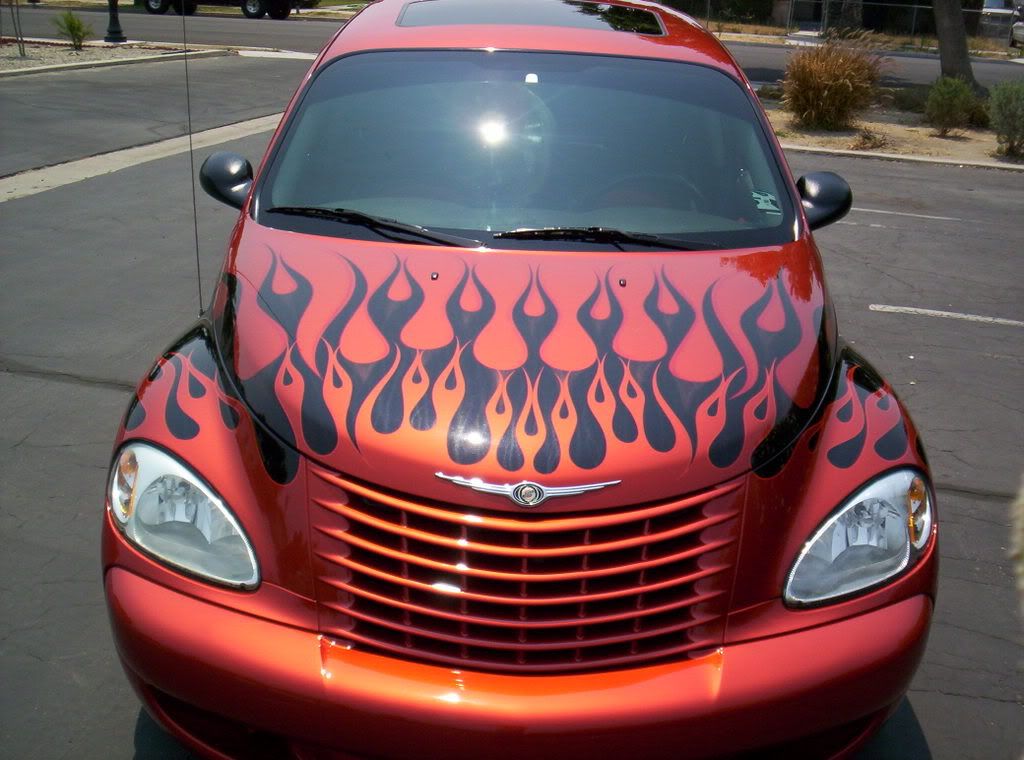
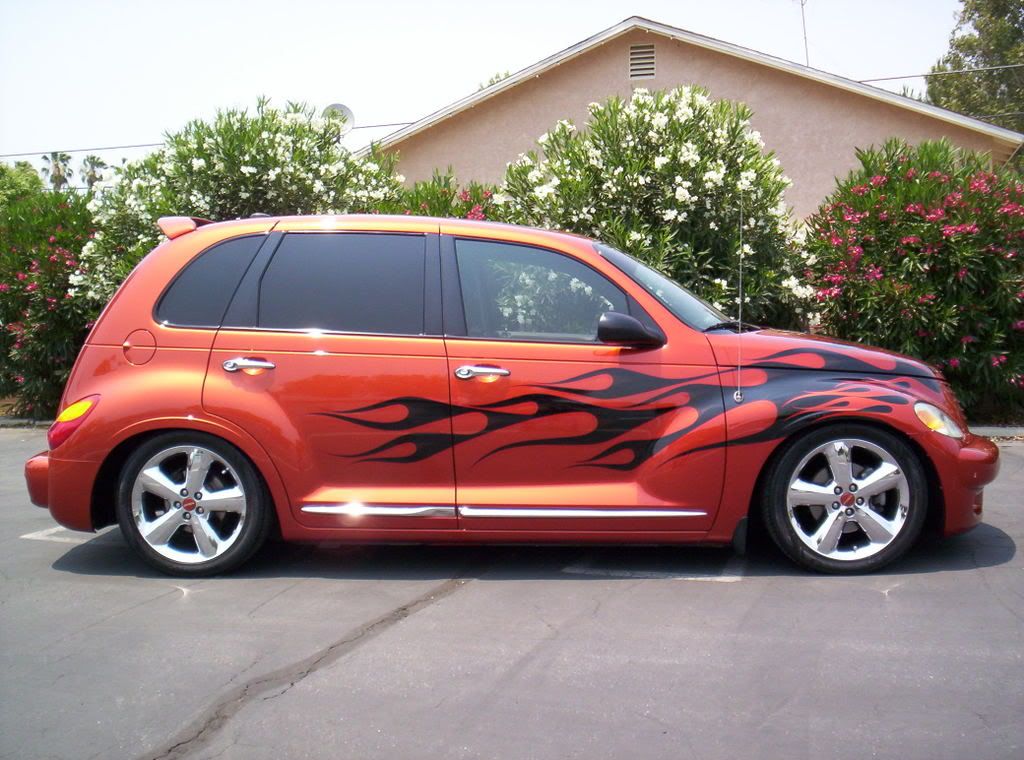
So that is the basic process to doing a Custom Flame Job. The Cost for something like what I have done here is around $2800.00 - $3000.00 as of March 2009, and the time you can expect to do this type of job should be around 4 - 8 weeks depending on how busy the Body Shop you pick is.
I love to try to inspire people to to look into Custom Paint! To me, it is probably one of the coolest things one can do to personalize their ride! Just remember to take your time, have fun, and always keep in mind that whatever you decide, make double sure it is exactly how you want it before you start cause once the process is started, its kind of like a Tatoo, their is no turning back, and if you don't like it, it is going to be very hard, and very expensive to change it, so be careful!
I hope this post gives you a little insperation to maybe look into Custom Paint! If so, I wish you the very best in your adventure, and please be sure to send me some cool picks once you are done, and as always, should you have any questions on Paint, please drop me a line and I would be more than happy to help out any way I can!
Till next time, go easy, and I will talk to you all later.
Candyman
Every once in a while I run across someone who is thinking about doing flames on their PT. While Custom Paint is always cool, I wanted to give you a run down on what all it takes to do a Custom Flame Job.
Before we begin, the only advice I might offer, and keep in mind this is just my thoughts when I used to play with custom paint work, and design back in the day. Most of the guys that I hung out with messed around with an air brush, did custom graphics , and were usually pretty artistic!
With this said, their are two kinds of customers when it comes to custom paint.
1. The first is the customer that is very set on one design, at which point the Body Shop will do it exactly the way the customer wants no matter if you might want Watermelon style flames, to you name it, which is fine, as ultimately its up to the customer!

2. On the other side of the spectrum, you have a customer that has a basic idea of a layout, but asks the painter, and air brush artist for their input, and see where that leads to! Kind of give them a little freedom to express their style, and creativity in your idea to create a piece of rolling art!
After all, Seasoned Automotive Graphic Artists have picked many colors, and done many different designs over their career! They have a pretty good knowledge of what works, and looks good, and would love nothing more than to become inspired by your design, and help transfer your concept into something really great! Then you will most likely find the air brusher to become a lot more into your project, and excited about making your custom paint into something really special, and eye catching! That is exactly how I handled my flames! I helped design the basic layout freehand in the booth, and allowed my friend to come in, and have some freedom over whatever he wanted as far as making it look cool, which made plain black flames, to "Wow, look at that"! So do not be afraid to ask questions, get other feedback! Ask about adding drop shadows for definition, or maybe some smoke peaking out from behind a flame lick, or hand pin striping to accentuate the lines, and so on!
Great Paint doesn't need to be over the top, cost a fortune, and be blindingly bright! More often than not, what catches ones eye is in the smaller details. The simple small details that make your paint more interesting, and totally unique to you!
So, what inspires you???
Here are a couple of color ideas for you!
Here is a PT with traditional Flame Color.

Here is a PT with a clean layout, and just a hint of color.

And finally, something subtle, but clean with a very neutral color that is not overstated, but just enough to give it that really cool look!l.

Here is a Link below to give you several choices on different colors and layouts to give you some idea's on things you can do.
s458.photobucket.com/albums/qq308/WestValleyCruisersPTCruiserArchives/CUSTOM%20FLAME%20JOBS/
Once you have decided on how you want for your color scheme, and layout, then here is a basic walk through on the work involved for a typical Flame Job. This was my Flame Job I did on my PT back in March of 07.
We started by disassembling most bolt on items like mirrors, door handles, emblems, from the car. In my case, I had a couple of defects in the paint, and chose to re-shoot the front bumper, and grille separately, so they were removed, and we also smoothed out a couple of spots on the body as well. Once the car was stripped, the paint was color sanded to the rear quarter panel.


Next we prepped, and masked the car, rolled it into the paint booth, and started laying out the flame design with thin tape. Their are a couple of methods for laying the design out. The newer ways utilize the computer stencil to get everything measured, and exact. We instead did mine the old school traditional method by laying out the flames by hand, and using sight for measure, which requires a more skilled painter, with a good eye to pull off.


After doing the layout, we then back masked the rest of the car that was not to be painted, and then proceeded to prep, and shoot the black flames. After letting the paint cure while we took a break, we went back in, and used an air brush to shoot copper Ice Pearl with Microflake at the tip of each flame, and then alternated streaks of gold, silver, and gunmetal gray Ice pearl with Microflake into the entire flame design to give it more depth, and the illusion of changing multiple colors as the sun hits it which gives it a little pop.

After letting the paint bake, and cure, we color sanded the paint back down to a dull flat surface, and moved on to our finishing touches. My friend Roger took over the air brush back, and did a maroon drop shadow to give the flames a 3D effect, and then finished off with a hand pin stripe that transitions from orange up front, to red as it progresses from front to back.


And finally, we shot 14 coats of clear, and here is the final look. The reason we used so much clear was to give it a deep rich color, and protect the flames from damage.

After the paint was baked, and cured, it was all color sanded down again, and buffed back out to a high gloss finish, and then final assembly.
We purposely designed the flame layout with future plans in mind, as I want to shave my door handles, and redo my front end later on, and can now do both without having to go near the flames in the process. And here is the car today.


So that is the basic process to doing a Custom Flame Job. The Cost for something like what I have done here is around $2800.00 - $3000.00 as of March 2009, and the time you can expect to do this type of job should be around 4 - 8 weeks depending on how busy the Body Shop you pick is.
I love to try to inspire people to to look into Custom Paint! To me, it is probably one of the coolest things one can do to personalize their ride! Just remember to take your time, have fun, and always keep in mind that whatever you decide, make double sure it is exactly how you want it before you start cause once the process is started, its kind of like a Tatoo, their is no turning back, and if you don't like it, it is going to be very hard, and very expensive to change it, so be careful!
I hope this post gives you a little insperation to maybe look into Custom Paint! If so, I wish you the very best in your adventure, and please be sure to send me some cool picks once you are done, and as always, should you have any questions on Paint, please drop me a line and I would be more than happy to help out any way I can!
Till next time, go easy, and I will talk to you all later.
Candyman

